Flying Dragon R-3D

abaser

Well-known member
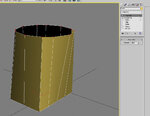
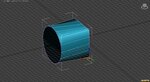
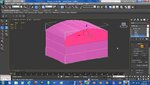
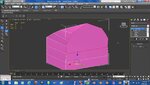
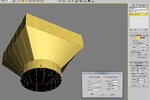
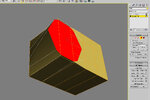
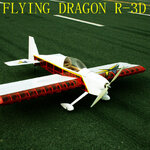
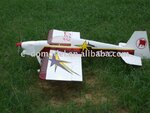
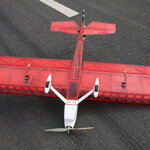
Well, I know Im jumping the gun a bit here, but here's my next build. The Flying Dragon R-3D. Apparently, this is NOT a very popular model, nor do I even know if its still in production. Again, Im going out of my comfort zone in a couple ways. First, there are only about 5 pics that I can find of this, and NONE qualify as even close to a 3 view. Second, this will be an "all in" model in max. Third, there are quite a few complex areas on this.

That being said, it will begin soon. Nothing yet to speak of.
 

Attachments

  • dragon--20322.jpg
    dragon--20322.jpg
    114 KB · Views: 24
  • Excellent_3D_aerobatic_flight_flying_dragon_R.jpg
    Excellent_3D_aerobatic_flight_flying_dragon_R.jpg
    99.8 KB · Views: 24
  • -u98DE-u9F99-2-68089.jpg
    -u98DE-u9F99-2-68089.jpg
    103.7 KB · Views: 22
  • -u98DE-u9F99-3-19530.jpg
    -u98DE-u9F99-3-19530.jpg
    33.4 KB · Views: 16
Its always fun to leave the comfort zone. You must be able to find more pics if it was in production?
 
I have 3 others I didnt post. It is very close to the Razor 3D, but there are differences. If worse comes to worse, Ill use shots of the razor to get the basic shape down.

I do have a question for you max guys. In wings, there is an option to circularize edges and verts. Where is that option in max? (Note I didnt say IS there an option:p)
 
Last edited:
I'm using it to make a circular shape of a group of verts. I find its not really what I'm looking for though. In wings, you can select a group of verts, hit circularize, and it makes a circle of evenly spaced verts. Not the case with spherify.

I used this method a lot in wings to make holes.
 
I'm using it to make a circular shape of a group of verts. I find its not really what I'm looking for though. In wings, you can select a group of verts, hit circularize, and it makes a circle of evenly spaced verts. Not the case with spherify.

I used this method a lot in wings to make holes.

Ah. That makes sense. What I have found is that the boolean modifier in 3ds max works far far better than the equivalent in Blender. Maybe I have just been lucky with the places I have used it. To get at it is rather wacky though. It isn't on the regular modifier menu. Instead you get to it by selecting compound object from the objects menu.
 
My reason for asking here was the nose on this model is round just behind the prop coming from a square fuse. Just looking for a simple way to make that transition. Areas like that have plagued me ever since I began modeling.
 
My reason for asking here was the nose on this model is round just behind the prop coming from a square fuse. Just looking for a simple way to make that transition. Areas like that have plagued me ever since I began modeling.

10-4 on that. My ghetto method for that sort of thing would be to start with a cylinder, perhaps 16 sides. Then pick the vertices and manually enter the coordinates I wanted for the square (5 verts to each side, because of common verts that works out to 16). Once I have it squared off, then move sides as needed. There are probably way better ways but that works.

I would bet there is probably a far more elegant way with the align tool or something.

Attached is example file (remove rfx extension).
 

Attachments

  • CircleToSquare.jpg
    CircleToSquare.jpg
    197.1 KB · Views: 5
  • CircleToSquare.max.rfx
    188 KB · Views: 2
Well, in a perfect situation, yes, it does work. However, what I was trying to do looked more like this. I was trying to get the highlighted poly in a circular shape. I managed to get it very close on my own, but this shows the results I was getting.
 

Attachments

  • zzz.jpg
    zzz.jpg
    140.5 KB · Views: 7
  • zzz1.jpg
    zzz1.jpg
    127.7 KB · Views: 8
If your wanting to join a circle to square you would use a "bridge" to do it (see pic)
 

Attachments

  • Image3.jpg
    Image3.jpg
    169.1 KB · Views: 6
Thanks oneder. This shows what wings will do for you, which is what Im used to. I know its going to take some time to get a grip on how different things are between the two, I just hope it comes fast.:p
 

Attachments

  • zzz2.jpg
    zzz2.jpg
    75.1 KB · Views: 9
  • zzz4.jpg
    zzz4.jpg
    74.9 KB · Views: 9
Spherify, then scale the poly down?
 

Attachments

  • Image4.jpg
    Image4.jpg
    149.5 KB · Views: 7
  • Image5.jpg
    Image5.jpg
    155.8 KB · Views: 9
Last edited:
Well, apparently I must be doing something wrong. Did you start heavy on verts on the top edge to accommodate for the arch?
 
You probably have this figured out but for future reference this is one way it can be done.
 

Attachments

  • 1.jpg
    1.jpg
    137.7 KB · Views: 8
  • 2.jpg
    2.jpg
    152.6 KB · Views: 8
  • 3.jpg
    3.jpg
    161.5 KB · Views: 8
  • 4.jpg
    4.jpg
    176.7 KB · Views: 9
  • 5.jpg
    5.jpg
    177.4 KB · Views: 9
Back
Top