In 8.00.052 (and .044) we've made some changes to the way that VR scaling is handled. This was in order to
VR scaling is also sometimes called VR quality, or VR supersampling, but it all boils down to the same thing - feed your headset more (or fewer) pixels in order to balance performance and quality.
This first post will cover adjusting the behavior for your Oculus headset, and I'll follow up with the procedure for SteamVR.
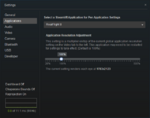
Adjusting VR resolution for OculusVR:
Higher values mean a higher-resolution image sent to your headset. This might look better depending on your rig, but will decrease performance. Always work to keep your framerate at 90fps. If it drops to 45fps, the airplane may start to double in your vision, and other things obviously won't be as smooth.
- account for changes in the SteamVR and Oculus API's
- offer more control to RealFlight users
- prevent some user confusion
VR scaling is also sometimes called VR quality, or VR supersampling, but it all boils down to the same thing - feed your headset more (or fewer) pixels in order to balance performance and quality.
This first post will cover adjusting the behavior for your Oculus headset, and I'll follow up with the procedure for SteamVR.
Adjusting VR resolution for OculusVR:
- From RealFlight, open the console (~ key)
- Type the command oculusVRResolutionScale (or type "oc" and press Tab)
- Press Enter. The current value will be displayed (default 1, or no scaling)
- To change the value simply type the same command followed by a number between .25 and 5.
Higher values mean a higher-resolution image sent to your headset. This might look better depending on your rig, but will decrease performance. Always work to keep your framerate at 90fps. If it drops to 45fps, the airplane may start to double in your vision, and other things obviously won't be as smooth.