
You are using an out of date browser. It may not display this or other websites correctly.
You should upgrade or use an alternative browser.
You should upgrade or use an alternative browser.
Gibsons Stearman CS
- Thread starter uncle twist
- Start date
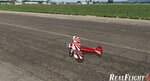
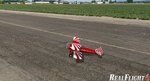
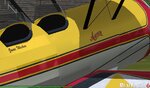
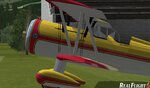
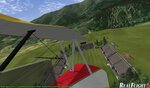
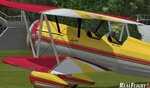
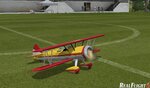
Well, for what its worth... i did my first Color Scheme attempt. I was just experimenting with the basics and changed the first red stearman CS that I got off swaps and put onthe checkerboard tail, changed the landing gear and top wing stripes... Whatcha think for my first try???
Attachments
phrank
Well-known member
Whatcha think for my first try???
See? Not that hard once you make an effort.
Just wait 'till you get to the normal maps and specular then the fun starts.
uncle twist
Well-known member
Wow Gibson, those look real nice. Your a natural. If you put the cam. in chase view, then taxi away from yourself....turn around......come back toward yourself, you can get some real good closeups shots. Use the "+" key to get even closer. Play with it for awhile, you`ll see ") . Feel free to post some pics here if you want, or better yet, the screenshots thread.
. Feel free to post some pics here if you want, or better yet, the screenshots thread.
If I was you, I would post it to the swap pages. Take some pics., so you can post them with you CS
. Feel free to post some pics here if you want, or better yet, the screenshots thread.If I was you, I would post it to the swap pages. Take some pics., so you can post them with you CS
Last edited:
Boof69
Well-known member
Wow Gibson, those look real nice. Your a natural. If you put the cam. in chase view, then taxi away from yourself....turn around......come back toward yourself, you can get some real good closeups shots. Use the "+" key to get even closer. Play with it for awhile, you`ll see
If I was you, I would post it to the swap pages. Take some pics., so you can post them with you CS
If you are using RF6 you can drop this file in your "scripts' folder found in MyDocuments. Then start RF go to a 3D field at any point you can hit both the "B"and "N" keys and your model will lock in position and orientation. Then you can use the WASD keys to walk to it if it's on the ground or if in the air first hit the "Q" key then you can fly the camera up to it for nice screenies. A quick way to get to your frozen plane is to hit either the "E" or the "ctrl+E" to snap to the models location. This will make for great screen shots.
Another quick tip for those who don't know. You can use "Shift+Home/End" to adjust the Suns azimuth and "Shift+PageUp/PageDown" to adjust the Suns inclination. Once you have a nice shot framed up adjust the Sun for a more dramatic shot.
Attachments
Last edited:
Interestingly enough, i actually did it with microsoft paint. My problem with GIMP is that it will not let me "save as" a tga file... it will only save as some .xcf file, which i can't convert at all to anything else as its not even recognized by any other program BUT gimp. I need help figuring that out
uncle twist
Well-known member
Did you use the "EXPORT" func right.
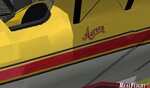
Will be posting some progress shots shortly
Will be posting some progress shots shortly
abaser
Well-known member
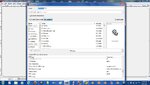
the file is a tga, and gimp will open it, but after I make the CS, i can no save it as a tga
Can you post a screeny of your expanded save menu as well as the.tga as it shows when you open it in gimp?
If it opens a .tga, it should save one as well. However, if you are comfortable with your other program, and it works, enjoy. That's what it's all about.
Last edited:
Maj. Numbskully
Well-known member
Just close the tga and say yes when it asks to save changes and thats it
If it opened as a .tga it will save close as a .tga
If it opened as a .tga it will save close as a .tga
If you are using RF6 you can drop this file in your "scripts' folder found in MyDocuments. Then start RF go to a 3D field at any point you can hit both the "B"and "N" keys and your model will lock in position and orientation. Then you can use the WASD keys to walk to it if it's on the ground or if in the air first hit the "Q" key then you can fly the camera up to it for nice screenies. A quick way to get to your frozen plane is to hit either the "E" or the "ctrl+E" to snap to the models location. This will make for great screen shots.
.
I'm new so i'm probably doing it wrong, but the WASD stuff only works on the ground. In flight, even if I hit Q, the camera just stops and the plane flies off into the distance. The screen notifications tell me that I can lock the camera position of I hit ESC or click the left mouse button, but it doesn't .
uncle twist
Well-known member

uncle twist
Well-known member

uncle twist
Well-known member
Boof, do you have to be at a 3D field ????