Hi all,
I have been lurking through the threads for over a week now. I came across a few threads which have helped me reach till this point. Thanks to @legoman and @spykez
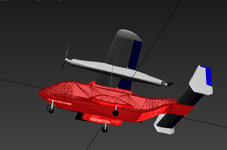
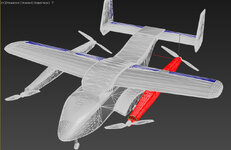
 for great question- answers. I have managed to import the model to RF from Blender ( Have never used Blender- so a newbie). It looks transparent, I believe it is because of incorrect UV wrapping.
I would like to get answers for the following questions that I am unable to resolve:
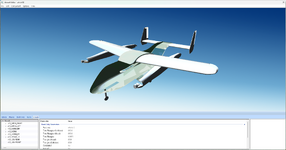
1. How to match the physics with the visual model? You can see from the attached picture, that the fuselage, arms, Htail, landing gears have been successfully matched but the vertical tail and wing wouldn't match. I would like to avoid having to enter all the wing/tail parameters if at all possible. Also, since the tail has 2 Vertical stabilizers and the reference model only 1, I am not sure how that would work out as the reference model naming convention has just 1 vertical stabilizer.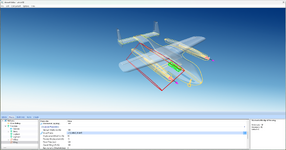
On the other note, is there a way to import the model, without relying on the already present model in RF? I am using a tilt-rotor model which is similar to the one that I am using on ardupilot page and have referred everything from that model. I am attaching that model below in a zip file
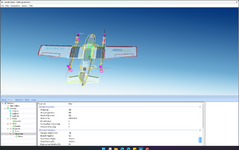
2. How to create a kex file? I watched a video on youtube and managed to export a png file as a .tga format. Somehow RF automatically detected that file and now it is using it as a texture file. It looks bad and transparent. How to fix that? I have access to blender, so would appreciate any steps that I can follow or a free white texture file that I can create for my model. If someone can create a texture file, that would also be great!
3. How to create an RFX file? I am only able to create a fbx file and it doesn't have any texture data (kex, tga?) linked to it. What's the easiest way to do that?
Files attached in a zip: kex and fbx file of the model I am working on, rfx file of the reference file
TIA
I have been lurking through the threads for over a week now. I came across a few threads which have helped me reach till this point. Thanks to @legoman and @spykez
I would like to get answers for the following questions that I am unable to resolve:
1. How to match the physics with the visual model? You can see from the attached picture, that the fuselage, arms, Htail, landing gears have been successfully matched but the vertical tail and wing wouldn't match. I would like to avoid having to enter all the wing/tail parameters if at all possible. Also, since the tail has 2 Vertical stabilizers and the reference model only 1, I am not sure how that would work out as the reference model naming convention has just 1 vertical stabilizer.

On the other note, is there a way to import the model, without relying on the already present model in RF? I am using a tilt-rotor model which is similar to the one that I am using on ardupilot page and have referred everything from that model. I am attaching that model below in a zip file

2. How to create a kex file? I watched a video on youtube and managed to export a png file as a .tga format. Somehow RF automatically detected that file and now it is using it as a texture file. It looks bad and transparent. How to fix that? I have access to blender, so would appreciate any steps that I can follow or a free white texture file that I can create for my model. If someone can create a texture file, that would also be great!

3. How to create an RFX file? I am only able to create a fbx file and it doesn't have any texture data (kex, tga?) linked to it. What's the easiest way to do that?
Files attached in a zip: kex and fbx file of the model I am working on, rfx file of the reference file
TIA

