bosshawg
Member
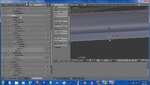
Reset Scale
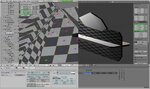
Select Object with Scale Not set at 1,press(Ctrl and A)buttons together choose "Scale to ObData".
Objects Not scaled to 1 can have severely distorted UV's and could be the source of your boolean difficulties.
Best Practice is to do all your Scaling in "Edit Mode" NOT in "Object Mode".
Hope this Helps.")
Select Object with Scale Not set at 1,press(Ctrl and A)buttons together choose "Scale to ObData".
Objects Not scaled to 1 can have severely distorted UV's and could be the source of your boolean difficulties.
Best Practice is to do all your Scaling in "Edit Mode" NOT in "Object Mode".
Hope this Helps.