Uploading repaint

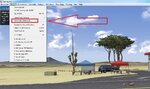
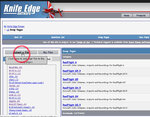
Did you do the Save Colorscheme as... first?


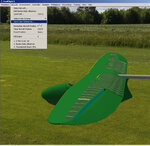
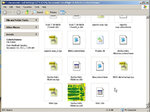
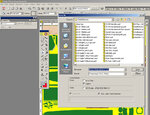
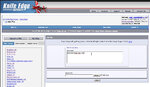
Yes, I opened up the glider, renamed it. Then selected the new colors and created a dds... then found the TGA file... edited it (quickly and simple)... saved the repaint and didn't lose my effects (window etc).

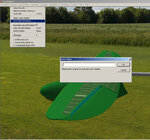
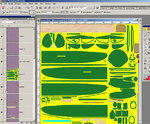
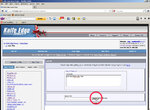
So now I just have to repaint the whole thing. I can save it without losing the specular effects (is that the right word?)... so I'll be back once the paint's done...

Thanks
 
Opened up the glider and renamed it? I'm not following.

The specular effects could be tied to the striping pattern on the original scheme. You may not want to reuse it.
 
Opened up the glider and renamed it? I'm not following.

The specular effects could be tied to the striping pattern on the original scheme. You may not want to reuse it.

I selected the original glider from inside the game. I opened up save colorscheme and renamed it (in RF). Then I selected it and it created a DDS. Then I went into Windows Explorer and found the TGF file created (the repaint). I opened it from that location colorscheme... then I'll edit it and save it in the same formate it was taken from the color scheme folder. No effects should be lost (they won't, I already tested it with a quick simple paint)

I'll have to figure out how to upload it later, but at least now by eliminating the one program, my file won't be corrupt.
 
I think you're still not doing it right. Start here. Name it something unique. Find that file and edit it.
 

Attachments

  • Untitled.jpg
    Untitled.jpg
    207.4 KB · Views: 3
Creating ,exporting, uploading CS files 101

These are basic instructions...............
choose the Aircraft you wish to create a new CS for and ..............

"Save Color Scheme As"
 

Attachments

  • 1.jpg
    1.jpg
    378.5 KB · Views: 3
Last edited:
Exit or minimize RF and go to the CS folder in My Documents( note the file path in the screeny .substitute
"GT n AJ" with your username................note: My OS is 32 bit XP)

find the .tga with the new name that was just created by RF in the previous step when you "saved As"
and open it in your photo editor
 

Attachments

  • 2.jpg
    2.jpg
    217.6 KB · Views: 6
Last edited:
This next step is optional but highly recommended
in your photo editor "save As" the tga file as a .psd file

As you create your Mona Lisa
do all of your work ON the .psd file and then transfer it to the .tga file (or "save as" a .tga with the same EXACT name as the new CS you are working on)

working on .psd files allows you to preserve layers
doing so makes your work flow MUCH simpler especially if you plan to create/use the optional normals files (_n.tga and _s.tga)(( not shown in this tut))
 

Attachments

  • 3.jpg
    3.jpg
    265.9 KB · Views: 4
  • 4.jpg
    4.jpg
    405.7 KB · Views: 3
Last edited:
Now that you have the finished .tga save it as described above and go in to RF..............

load the new CS
OR
if its already loaded
hit the red reset button on the Interlink
or select "edit Aircraft" to begin the dds file creation

This step may have to be repeated several times as you create your masterpiece to check your progress ..lets just assume you pulled off a miracle and got every thing right the first time:rolleyes:
 

Attachments

  • 6.jpg
    6.jpg
    117.8 KB · Views: 1
If every thing is satisfactory
and you want the RF community to bask in your glory.................. Export the CS
 

Attachments

  • 7a.jpg
    7a.jpg
    480.1 KB · Views: 3
Hit "Browse"

Navigate to the RF RFX folder and select the rfx file for your new CS

Hit "Submit"
be patient it may take awhile to upload
scroll down and you can add screen shots of your masterpiece if you wish ....DONE
 

Attachments

  • 9a.jpg
    9a.jpg
    294.3 KB · Views: 4
  • 10.jpg
    10.jpg
    274.2 KB · Views: 2
  • 11.jpg
    11.jpg
    179.8 KB · Views: 4
Last edited:
Thanks....

I have to figure out how to use my corel better. I can do somethings inside the mask, but not everything. I'll also have to figure out how to work with the PSD file..

Thanks again
 
Yeah for me! I'm making progress! After two days of trial and error, I was able to edit my paint AND keep the transparency in tact! In a nutshell, I opened the TGA file, inverted the transparency part and copied it... pasted it as a new object... then edited the picture (repaint). When I was done, I pasted the transparency part back and voila... saved the TGA and the edited part was there as well as the transparent canopy.

Now I'll re-edit the TGA completely then figure out how to upload it!

Thanks for your help guys... this is an animation I did with Corel photo8

http://i28.photobucket.com/albums/c247/mithbun/HarleyBouncesmaller-1.gif
 
Last edited:
When uploading, I get a warning saying this model is different than the one in their records...

Can anyone upload this?
 

Attachments

  • DG-800-A-G4.RFX
    885.3 KB · Views: 4
What file is that? First problem is that file name is incorrect. File names for aircraft should end in _AV.RFX, _CS.RFX, or _EA.RFX and not -G4.RFX. Secondly if it is an AV or CS file, it has to be uploaded from the same version of RealFlight as the original EA was uploaded from.
 
He obviously did not export the CS when he was done. I think all of the right files are in the archive. I don't know how he created it.
 
Back
Top