Blender Tricks and Tips

abaser

Well-known member
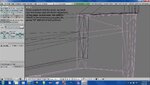
As I dig deeper into my modeling, I now have the desire to start modeling in Blender so Everything is done in one place. No chances of file damage during import/export from wings. As I have been researching this, I have come across several tutorials for Blender that I feel can be useful to the aspiring modeler.

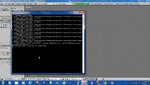
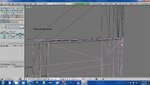
In creating this thread, I invite anyone who uses or has used Blender to model for RF to add any advise, tips, tutorials, ect. that might be helpful to the new modeler. I will begin to post some of the links I have come across in the coming days once I go through some of them to see just how beneficial they really are for RF modeling. The following is a tut that Bosshawg sent to me when I setup Blender. Inside are links to Blender 2.49b, the 3ds2kex exporter, and the python script needed for setup.
 

Attachments

  • Blender_tut!.pdf.rfx
    2 MB · Views: 144
Is the process in RF6 w/ Blender the same as it was for 5.5? I got a few models imported with 5.5 ok. I'm not sure if the latest python script had it built in or if I did the mods myself, but I had my Python script going through and renaming the the COLL objects and then running the 3ds2kex program for me so all I had to do from Blender was run the exporter and then I could import into RF.

I found it unfortunate that there isn't an ongoing process to keep the Python exporter up to date though. I'd like to see for instance something compatible with a newer version of Blender. Too busy with other work/projects/and flying real models to do it myself though! :)
 
As far as I know, nothing has changed. I have brought models into 6 just as I did in 5.5. However, I model in Blender 2.6 and export out of 2.49b. BE AWARE: If you follow this route, the python script doesnt like some things that 2.6 lets you do now. 2.49b imported the file fine, but for some reason, it will not export. Im not sure what I did to the file, but earlier versions still export fine. Looks Like I have a couple hours of rework to do, unless you have an idea what this means.
 

Attachments

  • zzz.jpg
    zzz.jpg
    155.5 KB · Views: 42
Well I know what the error means.

chr() converts an integer to a character value. Input has to be in range of 0-255. So 255*self.b would take a float value in range of 0-1 and convert to the integer value for the character and then it would convert it to the string. Not sure why the self.b value is not in the right range though.

But yeah, it would be nice to get the script updated to work with the latest blender so you didn't have to use yet another import process.
 
Umm........ya, that completely went over my head. :p :D If I posted my file, would you take aa look at it?
 
I'm not going to check it out unless I get a whole bunch of free time and decide it sounds like something interesting to look at for a while! :)

In the mean time I'm pretty busy with life stuff that I have to take care of. That and I'm trying to finish putting an Aeroworks Extra 260 together :)
 
Finding and using Bridge in 2.6

Here is a very useful tool in modeling. Problem is, it's turned off in Blender by default. So here is how to turn it on and use it.

Forgot to mention that in the second pic, you will find that menu under the "add ons" tab.:eek:
 

Attachments

  • bridge.jpg
    bridge.jpg
    205.4 KB · Views: 43
  • bridge1.jpg
    bridge1.jpg
    199.5 KB · Views: 42
  • bridge2.jpg
    bridge2.jpg
    244.1 KB · Views: 36
  • bridge3.jpg
    bridge3.jpg
    224.1 KB · Views: 33
  • bridge4.jpg
    bridge4.jpg
    288.4 KB · Views: 35
Last edited:
Continued:

Zip file included. Remove the .rfx when saving.
 

Attachments

  • bridge5.jpg
    bridge5.jpg
    295.1 KB · Views: 29
  • bridge.zip.rfx
    1.2 MB · Views: 8
Last edited:
Nice. Great tip. I have been using the difference boolean, which at least in 2.49 has given mixed results. Sometimes it works great. Others, not so much.
 
I don't know exactly the problems you were having with the boolean, but one thing that's a must for it to look right is your geometry has to match on both pieces before performing the boolean. If not things get deformed badly, at least that's been my experience anyway.
 
I don't know exactly the problems you were having with the boolean, but one thing that's a must for it to look right is your geometry has to match on both pieces before performing the boolean. If not things get deformed badly, at least that's been my experience anyway.

My problem was simply that it was not creating all the faces that it should have.
 
Pivots 101

Here is a tut for setting pivots in 2.49b.
 

Attachments

  • 4.jpg
    4.jpg
    239.7 KB · Views: 34
  • 5.jpg
    5.jpg
    248.4 KB · Views: 30
  • 6.jpg
    6.jpg
    258.4 KB · Views: 30
  • 7.jpg
    7.jpg
    253.6 KB · Views: 28
  • 8.jpg
    8.jpg
    211.5 KB · Views: 29
Cont........
 

Attachments

  • 9.jpg
    9.jpg
    205.8 KB · Views: 19
  • 10.jpg
    10.jpg
    218.4 KB · Views: 18
  • 11.jpg
    11.jpg
    239 KB · Views: 15
  • 12.jpg
    12.jpg
    197.4 KB · Views: 24
  • 13.jpg
    13.jpg
    220 KB · Views: 18
And......
 

Attachments

  • 14.jpg
    14.jpg
    185.3 KB · Views: 37
  • 15.jpg
    15.jpg
    194.1 KB · Views: 30
  • 2.49b pivots.zip.rfx
    2.2 MB · Views: 16
Here's a link to all of the hot key shortcuts (newer versions), how to setup 3 views (2.49b), and to a page with hours of video tuts as well as text tuts (modeling in newer versions than 2.49b).

http://www.foreverblender.com/2010/02/blender-25-all-hotkeys.html#
http://www.youtube.com/watch?v=SSedXO00H1c
http://gryllus.net/Blender/3D.html

Be aware that if you are setting up your 3 views in Blender 2.6.2 there is a much easier way to create the 3 views. There is an Addon called "Import Images as Planes" that you can turn on.
 
Honestly, if like to see your mapping technique. after 2 nights of disappointment, I'm back in wings.......maybe for good.:rolleyes:
 
Honestly, if like to see your mapping technique. after 2 nights of disappointment, I'm back in wings.......maybe for good.:rolleyes:

Mapping was a struggle, and I was mapping a foamy so it isn't near as complicated as what you are working on.

Basically, what I did was use the tga file I wanted to use for textures as a guide to moving around and placing the individually unwrapped objects. You can move the unwrapped pieces in the UV window very small increments just using the arrow keys on the keyboard. The same is true for scaling them and such. You do want to be sure that everything is scaled 1,1,1 before unwrapping, or they won't be proportioned anywhere near correctly.

[Edit] And I should add that a really important thing to realize when mapping in Blender is that if you have multiple objects selected at once, when you are in the UV window, the one you are editing will show up with heavy lines, but the others will show there positions with light lines. That makes it much easier to line up things precisely between different objects on the texture you are trying to use.
 
Last edited:
Honestly, if like to see your mapping technique. after 2 nights of disappointment, I'm back in wings.......maybe for good.:rolleyes:

I wish you'd make the move to max. It would be great to have another regular active posting member to share techniques with. Skype! :(
 
Back
Top