
You are using an out of date browser. It may not display this or other websites correctly.
You should upgrade or use an alternative browser.
You should upgrade or use an alternative browser.
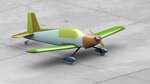
Sig Morrisey Bravo
- Thread starter Fly_electric
- Start date

doug schluter
Well-known member
gotta love the Morrisey Bravo 8)
Fly_electric
Well-known member
doug schluter
Well-known member
FE it's looking like a Morrisey Bravo what gives 8)
Fly_electric
Well-known member
Thanks guys.
Fly_electric
Well-known member

Fly_electric
Well-known member
Proper credit:
The non reflective floor used in some of the renders are courtesy of the quality work by Abaser. Thanks Andy.
Was unknowingly missing the concrete texture all this time.
The non reflective floor used in some of the renders are courtesy of the quality work by Abaser. Thanks Andy.
Was unknowingly missing the concrete texture all this time.
Attachments
doug schluter
Well-known member
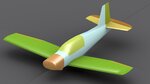
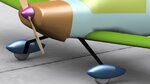
looking excellent FE nice LG and pants
Fly_electric
Well-known member
Thanks guys.
Andy,
Probably part of the typical price from the wing saddle cutout.
Item #2,455 of things to correct.
Andy,
Probably part of the typical price from the wing saddle cutout.
Item #2,455 of things to correct.
Fly_electric
Well-known member
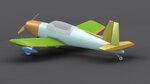
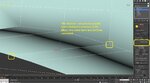
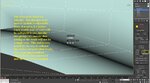
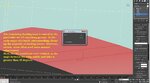
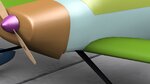
Andy's correct observation seemed like a good time to explain what some of the issues that can cause such shading/distortions and how they can be corrected.
Auto smoothing works very well and is handy in the early stages of a build, but as Boof has correctly mentioned in his tutorial, there are rules that have to be obeyed for the best results.
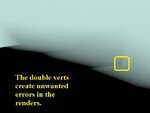
There is also a comment on cleaning up the excessive verts that usually result from using the boolean cutting tool. Another handy tool, but remember "clean up" is required.
Auto smoothing works very well and is handy in the early stages of a build, but as Boof has correctly mentioned in his tutorial, there are rules that have to be obeyed for the best results.
There is also a comment on cleaning up the excessive verts that usually result from using the boolean cutting tool. Another handy tool, but remember "clean up" is required.
Attachments

Last edited:
Fly_electric
Well-known member
A few more.
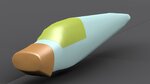
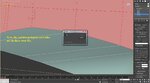
Note:
There will be a modeled prop attachment screw head in the spinner.
Auto SG'd at this stage, but when it is later placed in its own SG, the proper distinctive edge will be shown. Another example of the power of manually use of smoothing groups.
Note:
There will be a modeled prop attachment screw head in the spinner.
Auto SG'd at this stage, but when it is later placed in its own SG, the proper distinctive edge will be shown. Another example of the power of manually use of smoothing groups.
Attachments
Fly_electric
Well-known member
Thanks Carkshark.