
You are using an out of date browser. It may not display this or other websites correctly.
You should upgrade or use an alternative browser.
You should upgrade or use an alternative browser.
Pzl p1
- Thread starter jeffpn
- Start date
uncle twist
Well-known member
uncle twist
Well-known member
My bad as well, I`m still learning the lingo..
uncle twist
Well-known member

Fly_electric
Well-known member
You are doing good UT. Keep at it!
uncle twist
Well-known member
uncle twist
Well-known member
uncle twist
Well-known member
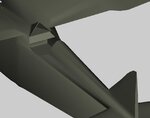
What do I do with the windshield "glass"..??? do I have to give/name it a diff. material,...and if so how??...tried searching, did`nt come up with anything decisive.
abaser
Well-known member
You will need to select all faces of the windscreen. Now, you can do this one of two ways. Preferably, Ill usually just bake the glass transparent. Or, you can map it and give it the ~ALPHA or ~CANOPY material so you can control the alpha on the .tga.
Either way, do the following: Select all faces of the glass, open the menu, right click "material", give it a name, adjust properties.
If baking, name it anything you like, and adjust the opacity slider in the material properties popup.
If mapping it for tga control, name it ~ALPHA or ~CANOPY and leave the opacity alone.
Below is a description of the material differences.
Attachments

uncle twist
Well-known member
OK, I should mention that i`ve made/created an inside and an outside of the windshield glass/pane, so that it would have some "thickness" if that`s the right terminology, does that make a diff....??? I`m leaning towards the baked, if I understand you correctly...I don`t care if it can be changed in the future.
uncle twist
Well-known member
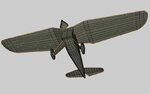
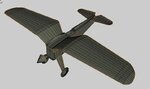
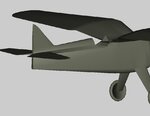
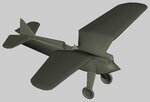
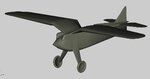
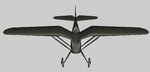
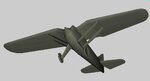
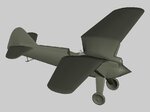
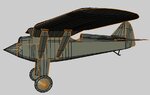
A couple more progress pics. Added tail skid, rudder, footstep and "cleared" the windshield, rearranged the IP. Should I do a cleanup or a smooth at this point. I`m going to add a seat and headrest next and/or the radiator/ oil cooler.??? to the bottom of the fuse (see pics. on page one)
Attachments
abaser
Well-known member
No smooth!!! Use your hard edges to set smoothing. As for a cleanup, not sure what you mean actually. There is an option in object mode that reads cleanup. Select all objects, hit cleanup, and it will remove isolated verts. However, if you added verts along the way to shape something up, and they only have the one edge loop running through it, they will be removed, so I really don't recommend it at this point.
Are you keeping an eye on your poly count? Just curious where you're at. Once you start the details, they really go fast.
Are you keeping an eye on your poly count? Just curious where you're at. Once you start the details, they really go fast.
uncle twist
Well-known member
uncle twist
Well-known member
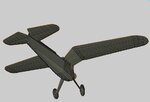
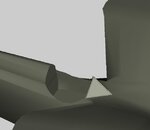
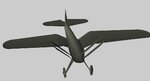
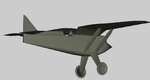
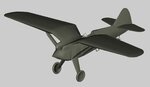
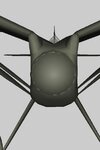
Another ? I have is...should I have modeled the spinner with the plane, and then cut it loose, or, as I have done, and used a separate cone, you can see the highlights around the spinner, I`m thinking, after it`s painted, it won`t be a prob.,...thoughts
Attachments
abaser
Well-known member
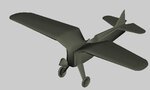
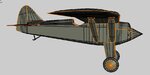
Ok, your hard edges look pretty good, but Id remove the ones around the wing leading edge and tips unless you want it to look like a knife coming at you. Also, remove the ones on your rims, and add some to define the transition between the tire and rim. The rest looks pretty close. Remember, you only want hard edges where there will be a distinct crease, or edge. It also looks like you've got them running across the decking in the cockpit area. Depending on what you're looking to have going on there, you may want to remove those as well.
Now, for rendering, Download THIS. I dont think there's any special install location. Once in Wings, you'll have to setup lighting. I usually just use the infinite light, but you can play with the different ones to find which ones you like. Then under the file tab, select render>kerkythea (click the box to the right so you can adjust the image size, save location, and other options) That should get you to a basic render.
Now, for rendering, Download THIS. I dont think there's any special install location. Once in Wings, you'll have to setup lighting. I usually just use the infinite light, but you can play with the different ones to find which ones you like. Then under the file tab, select render>kerkythea (click the box to the right so you can adjust the image size, save location, and other options) That should get you to a basic render.
Last edited: