SIG Rascal

Another small update (no pictures yet sorry.....I know boring and worthless without pictures)

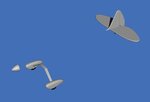
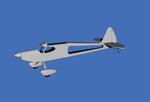
Last night I was able to get all the tail gear / wheel assembly as well as the outer h-stab skin completed.

Tonight I hope to start on the v-stab outer as well as the inner structure for both the h-stab and v-stab. At that point, it might be interesting enough to share a picture update.
 
How dare you post without pics? Chum-:D

Sorry, I'll now try and redeem myself with some actual photo progress! Not sure if I'll get to some of the inner structure of the tail surfaces tonight, as we have some company coming over later.

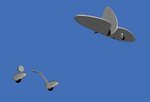
I'm doing this project / build totally different than anything I've done before. I'm able to build it object by object, and take measurements & photos from a model in my possession (even for my Laser 200, I used online 3-views) I'm building and placing the parts in the appropriate locations, and am curious to see how they all line up / correspond to each other when more parts are added.
 

Attachments

  • Rascal 1.jpg
    Rascal 1.jpg
    32.3 KB · Views: 14
  • Rascal 2.jpg
    Rascal 2.jpg
    39.4 KB · Views: 15
  • Rascal 3.jpg
    Rascal 3.jpg
    28.3 KB · Views: 13
Thanks guys.

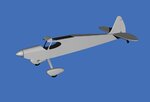
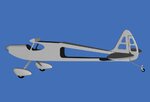
Change of plan after the company left.....instead of inner structure work on the tail, I thought it would be best to rough out the fuse to make sure all those bits floating in space had place to attach to correctly.

Shockingly everything there: spinner, main gear, tail gear and tail surfaces all fit into the fuse dimensions and profile picture I took of mine, with very minor tweaking! Looks like everything is fitting up nice and accurate so far.

Tomorrow I have to finish a could odds and ends for a little re-modeling project I did in my kitchen. Should get back on this project tomorrow night.
 

Attachments

  • Rascal 4.jpg
    Rascal 4.jpg
    28.3 KB · Views: 13
  • Rascal 5.jpg
    Rascal 5.jpg
    46.3 KB · Views: 14
Just a super quick update, plan to do some actual real modeling later tonight.

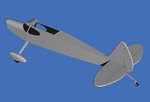
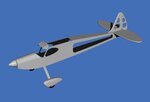
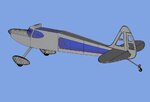
I dd the "cut out" / transparent panels in the side of the fuse. (note these will actually be done later on the alpha layer) However for now I did it:

1. It looks cool:p

2. It will help me determine where and how much of the inner structure is visible and needed.

Tonight I plan to take some photos of the wings and get them rough modeled. At that time the basic overall aircraft is complete, so I can go back and work on all the smaller details / inner structure.
 

Attachments

  • Rascal 6.jpg
    Rascal 6.jpg
    27.6 KB · Views: 10
Slight change of plans (for now) Camera batteries were dead, so wasn't able to get the photos of the wings (yet) So I decided to get a start at carving out the inner structure for the v-stab and rudder.

Both are done as they are on the real model. Rudder is solid balsa with holes carved. V-stab is layered (inner core with holes, outer "skin" with slightly larger holes and a simple raised divider between the two holes to keep the monokote flat.

My oldest boy asked if I'd lay down and watch a movie with him, so I'll take a break to do that.
 

Attachments

  • Rascal 7.jpg
    Rascal 7.jpg
    35.4 KB · Views: 10
  • Rascal 8.jpg
    Rascal 8.jpg
    34.2 KB · Views: 12
Looks nice. Any chance of seeing some edge lines? what's your poly count so far?

Thanks,

Here's a screen shot showing all the edges. I went overboard on the wheel pants, and plan to go back later and delete some unnecessary polys if needed....however on the other hand I enjoy looking at nice smooth shapes whenever possible.

As far as current poly count, it's been so long since I've used Wings3D that I don't remember how to obtain an accurate total. Overall I'm pretty sure I've used up a fair share so far.
 

Attachments

  • Rascal 9.jpg
    Rascal 9.jpg
    54.9 KB · Views: 18
No matter how you slice it wheel pants are poly eaters. You have two little poly banks there to make withdrawals from if need be later. They look good as does the rest of the model. Keep it up. :)
 
Thanks,

Here's a screen shot showing all the edges. I went overboard on the wheel pants, and plan to go back later and delete some unnecessary polys if needed....however on the other hand I enjoy looking at nice smooth shapes whenever possible.

As far as current poly count, it's been so long since I've used Wings3D that I don't remember how to obtain an accurate total. Overall I'm pretty sure I've used up a fair share so far.

To get your poly count, in face mode, with all faces selected, tessalate> triangulate. The end result is your poly count.
 
Wheel pants always take up polies on my models.

Everything looks so clean.

To get a poly count, combine all of your objects. In Face mode, select Tesselate|Triangulate. Looks like you have around 1,500 so far.
 
Last edited:
Ummmm................So far, everything I've sold, I've also bought. That cuts profits down quite a bit:p Im afraid it's still a no go for me:(
 
Back
Top