You are using an out of date browser. It may not display this or other websites correctly.
You should upgrade or use an alternative browser.
You should upgrade or use an alternative browser.
Galloping Ghost EP
- Thread starter technoid
- Start date
technoid
Well-known member
uncle twist
Well-known member
Thanks for sharing that Tech.....Ya know, Within the last week and a half I had new cable boxes installed for my tvs, which included some nice upgrades and remotes that I can just talk into and ask for literally whatever I want. SOOO,... I say into the remote "P-51 Mustang", thinking HA, I`m not going to get anything, low and behold, I get a bunch of vids. on the P-51. Anyway, One of them is a vid. of the plane without it`s skin, just showing the frame, engine, etc., etc. of what makes up the plane internally, SO, there`s a guy narrating and explaining everything, he finally gets to the engine. I don`t know why the fact that ...that scoop was an air intake didn`t cross my mind, maybe because it`s so small, I don`t know, but when I learned that in the vid. I went OH YEAH !!!, that`s what it is, I felt really stupid as in DUH !!! stupid. Now, when comes to the supercharger, that vid. showed pretty much what your pic. shows, I never knew the location of it, SO, I was surprised to see its location and all the ducting that makes it functional, it`s really ingenious. Anyway, thanks for sharing that. I was trying too figure a way to share that vid. in your thread, but I couldn`t see that there was a way to do so...UT. Here's a picture from a video on youtube showing how the nose intake is used to feed the supercharger.
View attachment 130393
Last edited:
technoid
Well-known member
Wow those remotes sound cool. Here's a link to the video I got the picture from.Thanks for sharing that Tech.....Ya know, Within the last week and a half I had new cable boxes installed for my tvs, which included some nice upgrades and remotes that I can just talk into and ask for literally whatever I want. SOOO,... I say into the remote "P-51 Mustang", thinking HA, I`m not going to get anything, low and behold, I get a bunch of vids. on the P-51. Anyway, One of them is a vid. of the plane without it`s skin, just showing the frame, engine, etc., etc. of what makes up the plane internally, SO, there`s a guy narrating and explaining everything, he finally gets to the engine. I don`t know why the fact that ...that scoop was an air intake didn`t cross my mind, maybe because it`s so small, I don`t know, but when I learned that in the vid. I went OH YEAH !!!, that`s what it is, I felt really stupid as in DUH !!! stupid. Now, when comes to the supercharger, that vid. showed pretty much what your pic. shows, I never knew the location of it, SO, I was surprised to see its location and all the ducting that makes it functional, it`s really ingenious. Anyway, thanks for sharing that. I was trying too figure a way to share that vid. in your thread, but I couldn`t see that there was a way to do so...
uncle twist
Well-known member
HA..!!...LOL, THAT`S the same vid. I watched, I couldn`t tell by the pic. you posted that it was the same vid, thanks for posting it.. It never occurred to me to "google" the vid, ( I knew it was a YouTube vid.) that way I could have posted in your thread, anyway, good of you too post it. It`s a very informative vid. with great graphics as well....OH, and yeah, the remote is cool, comes with a lot of functionality that the previous one never had.Wow those remotes sound cool. Here's a link to the video I got the picture from.
technoid
Well-known member
Yeah it sounded like the same vid you talked about that's why I went ahead and posted it for you.HA..!!...LOL, THAT`S the same vid. I watched, I couldn`t tell by the pic. you posted that it was the same vid, thanks for posting it.. It never occurred to me to "google" the vid, ( I knew it was a YouTube vid.) that way I could have posted in your thread, anyway, good of you too post it. It`s a very informative vid. with great graphics as well....OH, and yeah, the remote is cool, comes with a lot of functionality that the previous one never had.
JTUTTLE11
Well-known member
Both would be AWESOME!I'm trying to decide if a Galloping Ghost should be part of the PX series I did (Fun Fly) or Scale Model. So which direction do you think I should go? Fun Fly (Flip Flop) or Scale Model (go fast and turn).
View attachment 130231View attachment 130232
technoid
Well-known member
Because I have to take care of my totally disabled wife I had to pick just one. So since I like fun fly planes the best that's what I went with.Both would be AWESOME!
technoid
Well-known member
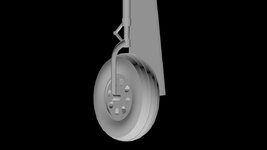
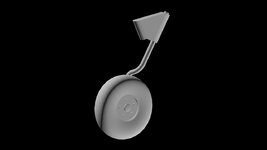
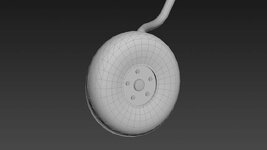
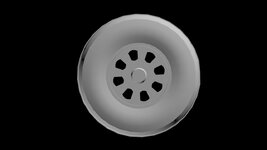
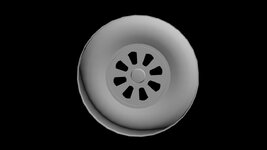
We've been gone most of the day to see my wife's specialist but I just finished tweaking the wing wheels. I rounded out the side walls a little more, reworked and repositioned the holes in the wheels and reworked the cap in the center. I think it's an overall improvement. Here's a "before" and "after" picture.


space boy
Well-known member
You're so good to be there for her.Because I have to take care of my totally disabled wife I had to pick just one. So since I like fun fly planes the best that's what I went with.
space boy
Well-known member
the after picture does look more evenly spaced and generally better.We've been gone most of the day to see my wife's specialist but I just finished tweaking the wing wheels. I rounded out the side walls a little more, reworked and repositioned the holes in the wheels and reworked the cap in the center. I think it's an overall improvement. Here's a "before" and "after" picture.
View attachment 130449View attachment 130450
technoid
Well-known member
I decided to change the way the front edge of the control surfaces look. Normally I round off the front edge of the aileron, elevator, and rudder and it looks good but on this plane the seam between the two parts needs to be square not rounded. So I just flattened the rounded part of the aileron so now it looks more like the real plane with a flat seam between the wing and the aileron. I don't have any pictures so hopefully I explained it okay. I still need to do the same thing for the elevator and rudder. So I guess that's the next thing I'll do.
technoid
Well-known member
Thanks.. I'll go check out your new AV.Hey technoid it seems Galloping Ghost will have a partner. I used your Bearcat and just put out a Rare bear AV.Can't wait till GG is finished your doing great as always.
technoid
Well-known member
I started working on flattening the seams between the control surfaces again today but after looking at them a little more I didn't like them as much as I thought I would so I decided to stay with what I had first. Ha.. that's the way it is with me I tend to flip-flop a lot when I'm modeling something. Sorry I'm a dummy.
technoid
Well-known member
Recently my wife's health has taken a bad turn for the worse so it's hard for me to do any modeling these days. I try to keep working on things because I need something to keep my mind going but it's hard and what I wanted to do would have taken much more effort than I was able to put into it. Yeah the plane will turn out okay in the end but probably not as well as I wanted it too. Seeing her struggle so hard just destroys me.I'm sure what you come up with for the final will be top notch.You are far from a dummy.


