Resource Library

Greetings all,

As to the original post, yes this would be a good resource for the community, especially beginners like me. I have an addiction to building Flight Test foam board airplanes and am moving into the design stage of a couple of planes. Looking forward to the ride...............
 
The scene looks more photographic in those examples, is there an addon for the Alpine Lake Cabin ?

You should be able to just download it from swaps and go. Alpine Lake is an included airport and the one with the Cabin is just another user made version of it. BTW I did lower the fishing boat a bit after installing as it floats above the water otherwise.
 
I downloaded it. I get what you say about the boat. I'm talking about the scene with the cabin on fire. Is that a photoshop ?
 
Better method for part copies than Mirroring

Mirroring
So there has been a long standing problem with inverted pivots in 3ds Max. That is that when mirroring a part, such as a wing for instance, the pivot will also be mirrored. You can most times solve this by going to the Hierarchy tab and turning on "affect pivot only" and then clicking "align to world". Sometimes however the pivot will not obey this as I recently encountered as I have many times before. The old work around was to create a new simple object, convert it to a poly then attach the offending part to the new object. This will now give the new pivot to our object at the new objects center. We can then use the "element" sub-selection to pick the new part and delete. Then "affect pivot only" and finally "center to object".

Symmetry
An alternate way of making a mirrored copy of an object and that is the "Symmetry" modifier. The method is as follows: Using a wing for example. Select the wing then select "Symmetry" in the modifier drop down. Select the X axis radio button. Then expand the modifier in the stack and select the mirror then with the move tool active right click on the up and down arrows next to the x coordinates box at the bottom of the window to set it to zero.
Now you will have both wings that are part of the same object. Select the element sub selection and click the new wing and detach. Selecting the new wing will show that the pivot is still at the original wings pivot so now we just go back to the hierarchy tab and select "Affect pivot only then "Center to Object".
Symmetry works reliably because it does not mirror the pivot.
 
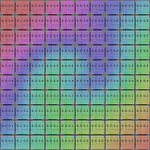
Here is a texture I use during the mapping process. It makes scaling and lining parts up much easier than the default checkerboard.
 

Attachments

  • CCE093A2-62CD-43D4-BEBB-323806DFB351.jpeg
    CCE093A2-62CD-43D4-BEBB-323806DFB351.jpeg
    230.2 KB · Views: 17
A couple of 3ds max mapping tips
This is two little tips that I'm not sure everyone knows dealing with UVunwrap in 3dsmax. The first is to mostly avoid the "quick planar" map tool. It is handy if you are mapping poly groups that are curving away from the projection but the end result of doing that gives distorted polys and the mapped section will end up angled and can be hard to square up on your texture map. The better solution is to use the "Projection" tools found a little lower down the main window tool window. Mapping polys that do not curve more than around 30° away from the projection plan then just stitching them back together after projected. By the way the projection type buttons are toggles and when active you cannot manipulate the part so you need to remember to un-toggle the button when done.

The second one is really important to get evenly sized pieces with which to start your texture map. By default the very last option in the main window tool menu "normalize map" and by default it is checked active. This will re-size and distort your part to fit in the 1 to 1. Un-checking this box will preserve the part's size and proportion. The new part will be very large and outside the 1 to 1. I usually map parts of the model and place them all around the 1 to 1 window leaving them full size until the whole model is done then re-size and pack them at the end.
 
Last edited:
Nice tips. The second I was aware of but have never used the projection method. I actually used the spherical planer map on my spinner this build and it worked great. I selected all faces at once and the result has no stretching at all. Was thinking about trying the cylindrical for the fuselage off my next build to see what would happen but just might try the projection too.
 
Last edited:
There are lots of methods for mapping varieties of shapes. The first tip is just a caution against the quick planar map tool and gives an alternative that works the same but with more control. I know you know this stuff anyways Andy. Your CS shots prove that.
 
lol! I may know some stuff, but I also like to learn new methods. Mapping is about the biggest headache so anything to make things simpler is much appreciated by me.
 
I hope I can ask this here. How do make gear cause more drag, and not just weight? Or anything for that matter.
 
Gear objects don't have an option for modifying drag. Wheels however do. Look for "Frontal drag factor (%)" Default is 100 but can be increased to 1000%.
Also Fuselage, Detachable, and Airfoil parts all have a setting for drag called "Parasitic Drag Factor (%)" Default is 100 with a max of 200.
Control surfaces have "Blowback Factor (%)" Default is 0 with a maximum of 600. This setting is not a direct drag setting but does give some control over the effectiveness of the surface at various speeds.
 
Back
Top