
You are using an out of date browser. It may not display this or other websites correctly.
You should upgrade or use an alternative browser.
You should upgrade or use an alternative browser.
Focke-Wulf 190 D9 development thread
- Thread starter dhk79
- Start date
dhk79
Well-known member
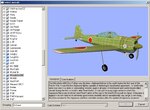
Commonly known as a "Zero", the Mitsubishi A6M Reisen is another plane I'd consider modeling. It probably won't be until after the holidays though.
I have a real RC plane that I need to get back into my shop to work on. It's missed me the last several days, as I've been puttering around on the computer.
I have a real RC plane that I need to get back into my shop to work on. It's missed me the last several days, as I've been puttering around on the computer.

dhk79
Well-known member
Actually I have started working on the Zero. It's gone surprizingly quickly. About all that's left is to finish the final details & clean-up of the texture map and maybe some tweaks in the flight physics???
This one I need to ask someone about. The plane is very stable and I've already backed off from the hairy edge of it's performance envelope (so I'm hesitant to tone it down much more), but its roll rate & turning radius seem significantly higher than the other warbirds I've flown. Is this normal for the Zero? I know the Zero is listed as being extremely maneuverable, but I'm finding this a little hard to swallow. This plane handles like a 3D bird.
This one I need to ask someone about. The plane is very stable and I've already backed off from the hairy edge of it's performance envelope (so I'm hesitant to tone it down much more), but its roll rate & turning radius seem significantly higher than the other warbirds I've flown. Is this normal for the Zero? I know the Zero is listed as being extremely maneuverable, but I'm finding this a little hard to swallow. This plane handles like a 3D bird.
Attachments
Last edited:
crashed again
New member
dhk79 said:In Real Flight open the new plane up in the editor and you'll see that nothing matches up.
Starting with the fuselage make the Real Flight physics model match up with the 3D one.
Move from one part to the next until you get the whole plane done.
i found this issue mentioned to be a pain in the ..., but if you experiment a little, you can drop the model into the sim straight from "the drawing board".
in my case, the directions were inverted, when i moved the model down in 3ds, it moved up in rf53, and so on. but within about three tries of expoting the model, you will end up with a model and physice model that need little tweeking to line everything up(transperiency and skeleton).
thanks for the info, these threads help very much!
ben
brentg
Well-known member
dhk79 said:The canopy and fuselage were shaped as one part so that the edges would match exactly, but now it is time to seperate them into two. Selecting the boundry lines between the two parts, cut them apart and move the canopy up out of the way. Then extrude the interior down so that you can later add details to the interior of the cockpit.
Define the bottom surface of the canopy as a "hole", so that it has no real surface and move the canopy back into place.
Note: The control surfaces of the wings will be seperated the same way as the canopy/fuselage. The entire wing structure will be made as one part and then the control surfaces will be cut out of it.
DHK79,
This is a great tutorial, I wondered if you could tell me the tool and process for cutting a part away, I have read and reread the docs, but am missing something. I have got the shaping part ok, it is just the cutting i am having problems with, also could you explain post # 12, I know i have been doing this all wrong by making and reshaping let say "the elevator" and then making the LME and RME separate.
Using 3dsMax7
Thanks
Brentg
brian94066
Member
wow, nice plane
i wonder if i could try it out =P
i wonder if i could try it out =P
dhk79
Well-known member
All of those processes use what is called a "loop cut" (in 3D Studio, I believe it is known as an edge cut). Basically you cut a part by selecting a continuous band of line segments and applying the cut. Sometimes you have to make more than one cut. For example on ailerons, you often have to cut around the wing tip and root before you can cut an aileron. Then you rejoin the tip & root to the main wing with a weld command.
Step 12 shows the process of loop cutting in action. First the wing is cut at each end of the control surface. Then the control surface is cut out of the remaining section. This process makes modeling the wing & control surfaces much faster than trying to do each individually.
Step 12 shows the process of loop cutting in action. First the wing is cut at each end of the control surface. Then the control surface is cut out of the remaining section. This process makes modeling the wing & control surfaces much faster than trying to do each individually.
Last edited:
dhk79
Well-known member
Most good 3D programs have the ability to import images for use as templates. In Wings this is called an image plane. In 3D Studio (and GMAX) it is called a viewport background. They both work the same way, just be sure to lock them so that you don't accedently select and move them.Win Hand said:Are you using a CAD rogram, because it looks like there is a Blueprint you are modeling over. That must be nice when I have to do it all be eye, I can't put that stuff in the back ground.
crashed again
New member
dhk79 said:In Max the axis which translates to the rotation axis in Real Flight is usually X (the red one). The exceptions are the engine & spinner, which for some reason use Y (the green one).
may be for the simple reason so that ALL the pivots point in the same direction as the plane fly's?
just my two cents
crashed again...